Showing posts with label living naturally. Show all posts

Friday, February 2, 2018

Choosing a mattress for long term health for your children - My Green Mattress Review


Sleep. The final frontier for parents, right? We strive for sleep for our children and ourselves pretty much from day one. I don't remember ever being so obsessed over the thought of sleep before becoming a parent! Coordinating nap times, bed times, coping with your own interrupted sleep that can last for years, dissecting why your child isn't sleeping the same way as they did last week. It. is. exhausting.

As our two girls are growing older we have begun to consider how we are going to adapt their bedroom from being toddler-focused to more a forward, long term set up.  From the time that my second daughter was night weaned and no longer bedsharing with my husband and I, she has been sharing a bedroom with her older sister. Each girl had her own cute toddler sized bed. We knew that we wanted the sisters to continue to share a bedroom but graduating them to twin or full sized bed frames would occupy too much space for their bedroom. Thankfully we scored an amazing deal at our local furniture store for a floor model twin-over-full bunk bed frame and we snatched it up right away!

To give you a short background on where we are coming from; we bedshare with each of our children until they are night-weaned at about 18 - 24 months. Our first two children were girls and we excitedly helped them embrace this special relationship by sharing a bedroom. When we purchased the new bunk bed, we naturally we expected our older daughter (Penny) to want to take the top bunk. But as it turned out our 3 year old (Ruby) was the better candidate because she sleeps through the whole night and never leaves her bed. It's always been that way! Penny is still a night waker; which we've concluded is because of her primary love language: physical touch. The girl still very much loves her snuggles and works diligently throughout the night to sneak into our bed for more! Towards the end of my last pregnancy we set goals for her to find ways to cope with this need; giving her need a name ("the snuggle tank"), with increased snuggles at the end of the day and self-gauging her needs. But we had to draw the boundary for how much time she sleeps in our bed in preparation for our bed-sharing time with Baby Brother whenever he arrives. It's been a slow and gentle process that we are hoping will make more sense to her when her brother arrives and she can tangibly see- there just isn't a whole lot of room for 4 people in our bed as well as it's just not going to be very restful sleep for ANYONE.

In the wake of purchasing the new bed frame that we intend for the girls to use until they move out, we also knew that an equally (if not more) important decision was what type of mattress they would sleep on. Why would it matter? Consider that this piece of furniture will be in contact with your child for usually over 10 hours a day for over 10 years (the average lifespan of a mattress). Not only is comfort a key factor, but the material needs to be as well! There is a broad range of mattress styles, thicknesses, material choices and price points available on the market and it's important to understand how to balance those in the best way for your family.

When I started doing research for new mattresses for our children I started with a wide cast net - what is the least expensive but most readily available option? What kind of mattress does this provide? What kind of product is offered at the opposite end of the spectrum? What do my friends recommend? What are the online reviews? Does it have springs, is it entirely foam, or a combination? Why would material choice matter; comfortable is comfortable, right?

It turns out no; not all mattresses are created equal! No surprise, the quality of materials and the type of comfort you are looking for play a huge role in the price of the product. There are tons of options available at both ends of all the factors one would want to consider.

Long term studies are still being conducted on the effects of the use of memory foam and other petroleum products in the sleeping space. One can't argue that the costs are lower, they are easier to manufacture and memory foam is comfortable. The use of flame retardants in mattresses and childrens clothing has also been shown to be toxic; with several of just as effective non-synthetic options to consider. But because many modern manufacturing practices focus on the bottom dollar rather than the well being of their customer, I am wary of how the use of certain products will affect myself or my family over the course of our lives. This is why I research as much as possible if I am given a choice in a product and opt for responsibly sourced materials and manufacturing practices.

My main goal for choosing a quality, safe sleep mattress for the long term use by my daughters was that it was made from natural materials and did not use memory foam.  Memory foam has become a very popular choice in mattresses; in fact it's quite difficult to find any mattress, especially childrens mattresses to be without it.

This is how we discovered My Green Mattress. Their Pure Echo mattresses are made with GOTS certified organic cotton and wool. No petroleum based memory foam that off gas and emit VOCs that are dangerous for developing systems. The coils keep the mattress soft yet firm without the need of foam to make it more comfortable.
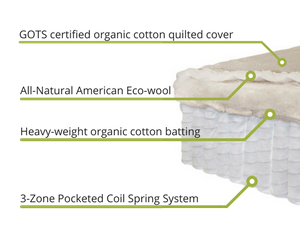
The mattresses arrived tightly rolled up, also in an effort to be more eco friendly and save on shipping space and costs.


We unrolled them and expected to have an air out period to get the manufacturing smells or any other scents to dissipate before having our children sleep on them (this is called "off gassing"). There were no obvious odors, but we gave them a day to relax and the following morning I put them onto our brand new bunk beds.


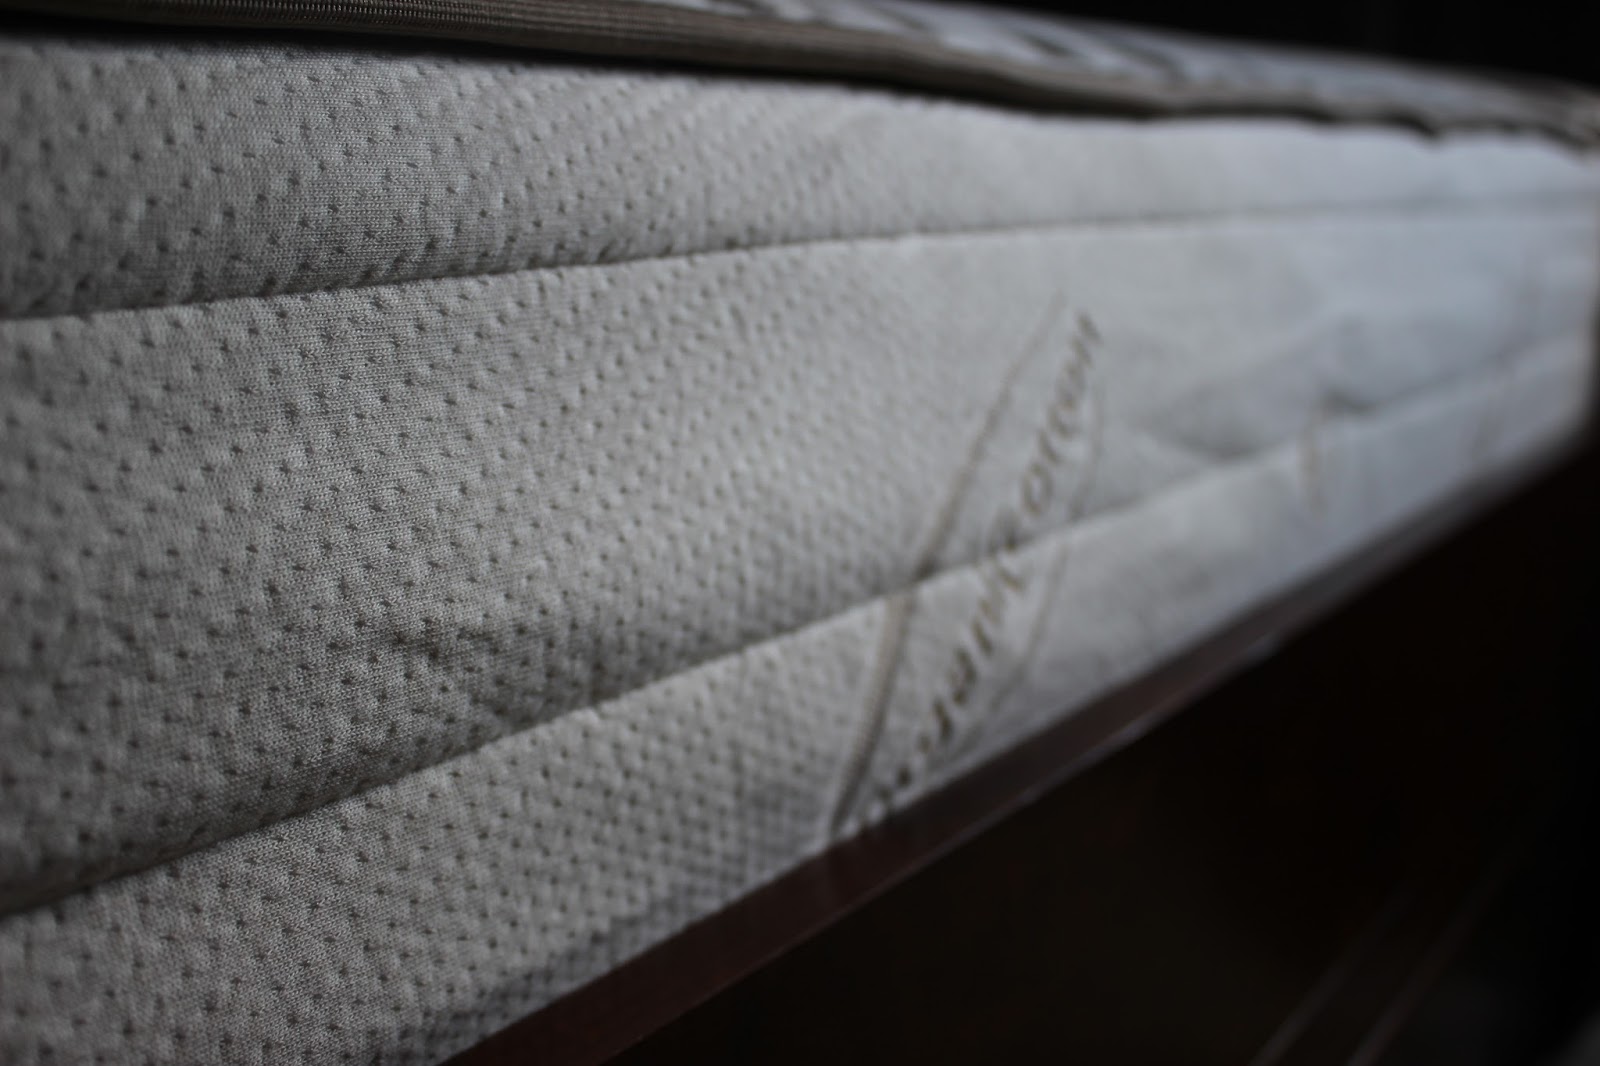


The girls were both so excited for their new big bed. Both bunks have been the source of hours of imaginary play and a quiet nook to snuggle or read. Since Holden's arrival, there has been a night or two that my husband slept with either girl that needed some extra snuggles. I've even crawled into bed with each of the girls, when the whole house is asleep, to catch up on snuggles that I have been missing from them while I've been focusing on the new baby.  Even in being accustomed to a very soft and forgiving memory foam mattress, the Pure Echo mattress is still very comfortable to an adult. Best of all, I know my kids can safely sleep on them for years to come.

Learn more about My Green Mattresses and why you should consider them when purchasing mattresses for your family's long term health.

Disclosure: Thank you, My Green Mattress, for facilitating this review! 
I received product in exchange for my honest opinion. No other compensation was provided. 
All photography and opinions are my own. 

Monday, September 18, 2017

Omaiki Mini-Ö Newborn Diaper Review


Are you thinking about taking the plunge for cloth diapers with your newborn? I've used cloth diapers exclusively for all three of my kids and each time around I've learned something new. Holden arrived this summer and while he was over a pound heavier than his sister before him (and over two pounds heavier than his oldest sister), we still had a good run at newborn cloth diapers and I wanted to share our experience with Ömaiki Mini-Ö newborn cloth diaper.


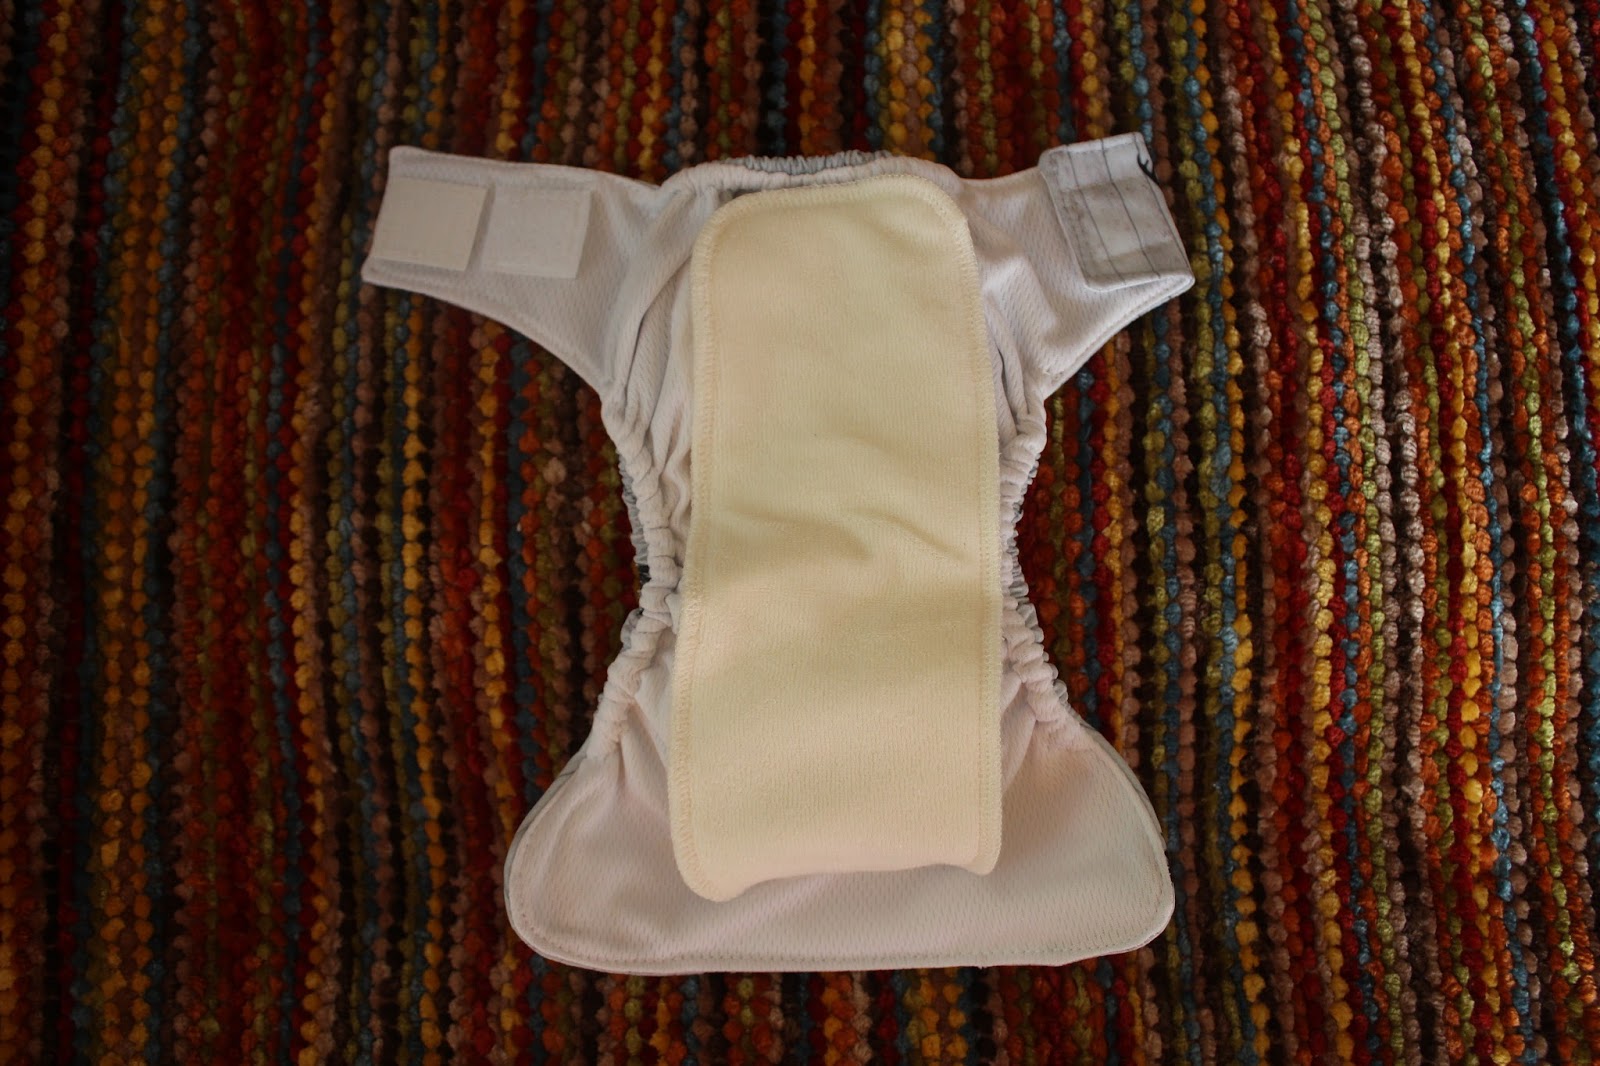
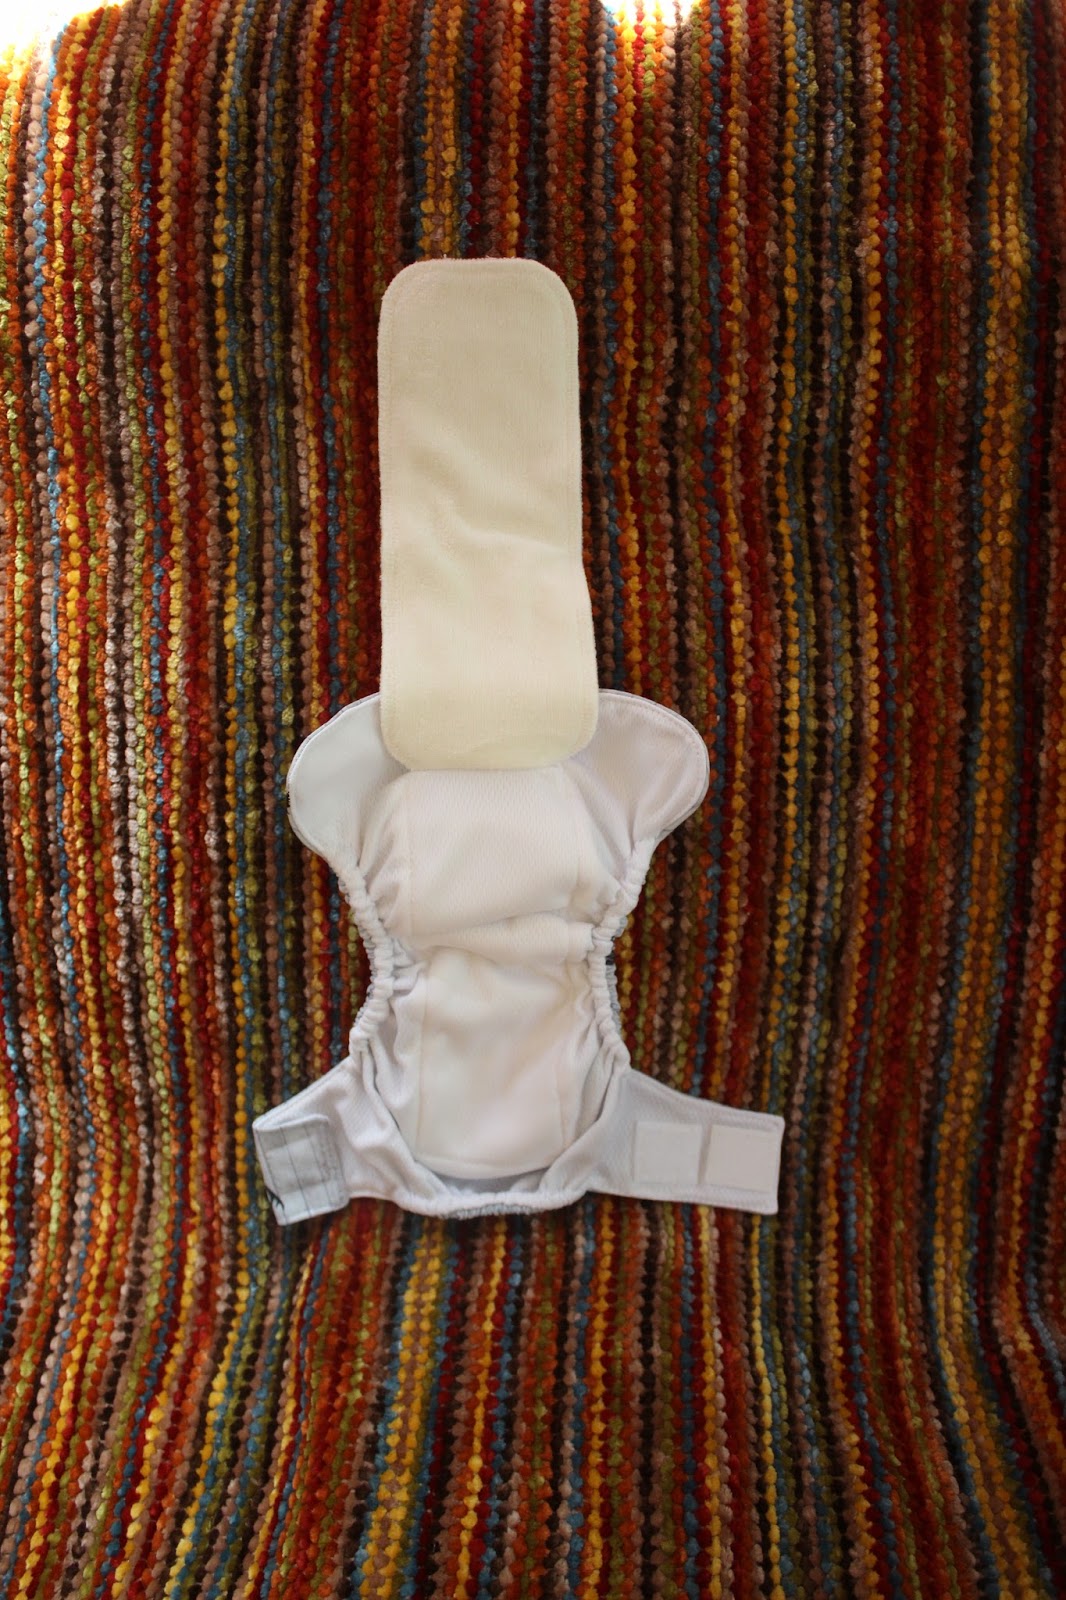
They come with an adjustable waist line that uses aplix ("Velcro" style) closures, which is helpful for the wide range of belly sizes that newborns may have. The diapers two sets of rise heights, also perfect for snapping down to a smaller size if necessary.


The Ömaiki Mini-Ö diaper is an all-in-one style cloth diaper in which the absorbent insert lays flat on the inner part of the diaper, but hangs loose so that washing and drying are less energy intensive. Most AIO cloth diapers get a bad rep because although they are a completely enclosed one piece (making them very easy to use, especially for those not accustomed to cloth diapering), they take more water to completely wash and more dryer time to fully dry. This design that flips the insert out, but keeps it connected to the diaper, aids in faster turn around time on this diaper. And that's a big help because as you know...newborns used A LOT of diapers! The absorbent insert fabric is bamboo viscose with organic cotton, with a polyester topper to wick away moisture quickly. Bamboo is by far my preferred material of choice because it is so absorbent and retains a lot of moisture. 


"Little" Holden was born weighing 9 lbs 9 oz and was my biggest baby. With my daughters (7 and 8 pounds, respectively) it took a little bit of time after birth for them to really seem like they fit into even newborn cloth diapers, but this guy wasted no time. However, because of his larger size at birth and very quick weight gain, we used these diapers for a shorter period of time than I would have expected to use had it been for my girls. Such is life!


At about a week old and roughly 10 lbs, Holden fit into the diapers quite nicely. The rise of the diaper didn't interfere with his umbilical stump healing. Because this diaper was developed for newborns, his skinny newborn legs were wrapped perfectly with no leaking.


The Ömaiki Mini-Ö diaper fits babies from 5 lbs through 3 months, however in our experience Holden fit the diaper most comfortably through about 12 lbs (which was one month of age). 


Disclosure: I received product in exchange for my honest review. No other compensation was provided. All opinions and photography are my own.

Wednesday, March 22, 2017

The Pierogie Peepers Vol. 2

Last year I wrote a little blog post chatting about the new chicks that had landed on our new homestead - Pierogie Peepers Vol. 1. I've been keeping chickens for about 3 years but Spring 2016 was my first batch of chicks. I went a little crazy (well, at the time I thought I was!) and got an assortment of 11 chicks and 3 broad breasted turkey poults.

Over the course of that summer, two of the chicks were lost to an overnight raccoon attack and I ended up with three roosters. Life and loss are something to be expected out in the country; it certainly wasn't easy dealing with their loss but you have to move on.

In November the turkeys were at their ideal butcher weight and we slaughtered them ourselves, along with one rooster that didn't end up getting rehomed. Some might ask if that was a hard thing to do, and initially I planned to not be a part of the slaughter process. At the last minute I decided that it was my responsibility to see it through; because it's not fair or responsible for me to continue to want to raise them for the future and not be fully aware of the entire process. You can read about our first year of raising turkeys (I did not include any graphic pictures, I promise), but I found that because of the equipment we had rented it made the process quiet, easy, not traumatic for anyone and the animals passed without incident.

That left me with a dozen hens for the winter and it took until past the Winter Solstice for most of those chicks that were hatched in May to begin to lay.

I am a part of several chicken keeping facebook groups and it was recommended to me to see about raising chicks in the winter. The idea is that those chicks are hatched from hens who have the hardy gene to continue laying through the winter and a big plus is that I'm done with the hard part of raising chicks before the summer! And for those of you following along... I am due with Baby #3 (a boy!) in June so that is really ideal for me this year.

So I set out with the idea that maybe I'd get 6-8 new chicks this winter. That doesn't really work out well when your good friend raises Black Copper Marans and hatches an incubator full of gorgeous dark chocolate colored eggs on New Years Day. So 6 peepers came from there. Naturally, one is always looking to add color to her egg basket so I also decided that this year would be my year to get some "olive egger" chicks, which are a mix of a blue laying hen and a dark brown gene rooster to create a stunning olive green colored egg. 6 Olive Egger babies came a couple weeks after my Marans.


A photo posted by Bianca @ The Pierogie Mama (@thepierogiemama) on


Then finally to round out this craziness, since I was already knee deep in it, I decided to order 6 Cinnamon Queens from Cackle Hatchery. I had added two Cinnamon Queens to my flock in 2015 who started laying at the tender age of 14 weeks, which is crazy in comparison to the Peepers from 2016, who started laying at around 28+ weeks! These girls were added as my power layers.

Those babies arrived after a perilous journey from Lebanon, MO all the way to Skagit Valley, WA on the one day that it has snowed in the past 5 weeks. Great! So we hurried those little peepers home, put them under the heat lamp with their first drink and meal since their birth. As it turned out, I got an additional production red baby to tag along too.


Silly me, I thought I was done. After all, I had made myself promise that I would only do 3 rounds of my favorite and "must have" breeds for 2017. But chicken math does not work that way!

Around 5 weeks of age I had each of the phases moved to outside in a segregated run underneath my chicken coop and main chicken run. This gives the 2017 chicks the opportunity to see and interact with my existing flock of 12 laying hens but protects them from being pecked on.

Sadly a couple weeks ago I lost two cinnamon queens who got smooshed at the bottom of a cuddle puddle overnight. I was so sad, because the cinnamon queens breed is "sex linked" which means boys and girls are different color right when they hatch so you know immediately if you have pullets or roos. I tried to stay strong; every year chicken farmers experience a little bit of loss and I knew something was probably going to happen that is outside of my control. Then I found a stellar deal on free shipping + $5 off for 10 chicks through Tractor Supply; so a friend and I split an order of 10 cinnamon queens. This time I PROMISE, I am done for the season!


More sadness.. the shipment of 10 cinnamon queens (plus an extra, just in case) suffered major losses. 10/11 of the chicks died in less than 24 hours. Thankfully Tractor Supply gave me a full refund immediately, but it is a bit traumatizing to see so many chicks die for apparently no reason so quickly. The remaining chick will be going home to my friend's farm.

Where does that put me? 12 original hens and 17 Vol. 2 Pierogie Peepers = 30 chickens. I have gone off the deep end, haven't I? I do have to keep in mind that my 6 Marans and 6 Olive Eggers each have a 50% chance of being roosters, because they were purchased "straight run", and as a certain troll on my instagram feed learned this past week - roosters don't live for very long at my house. My primary goal for raising chickens is for pleasure and the second is because my family loves eggs and we sell our excess. In a free range or breeding program setting roosters are valuable members of a flock, but in my case our chickens are always kept in a protected area as we have many predators and I'm not breeding chickens, so roosters are unnecessary. I do my due diligence to try to rehome them if someone else has a breeding program.

Are we all entitled to differing opinions on where food should come from? Yes. Is raising animals for meat for everyone? No. So to put to rest any questions on what happens to roosters at my property - they get humanely and efficiently slaughtered and my family eats their meat. I don't do it heartlessly, I look back at pictures of my rooster, Babcia, fondly and remember how cute HE was when he was little. But the truth was, he wasn't able to be rehomed and he kind of became a jerk when he was the only rooster in the pen. I couldn't risk having him attack me, or my kids, whenever we go into the run. Which is every day. I've been trolled by several people and baited into arguments - and the fact of the matter is that all of my animals are given a loving life and I make sure that their last moments are not filled with fear. That's saying so much more that what the meat that we buy at the grocery store can say.

...End rant.

Anyways, that's the start (and end) of this year's fuzzy butt journey!

Wednesday, December 21, 2016

Our First Year Raising Turkeys for Thanksgiving


Disclaimer: This is a post about raising turkeys for Thanksgiving. Yes, we slaughtered our own turkeys. Due to the nature of this post, the very end will describe the process, but I did not include pictures of the process (mainly because I didn't really think to take any).

This year we moved to our dream home, a modern "homestead" of sorts, and so many of my husband's and my goals are coming to fruition. We have just over 5 1/2 acres of space that's a range of flat usable yard, terraced paths where we built our chicken coop and plan to grow a vegetable garden, an established apple and pear tree, trails to run our quad and dogs on, a creek, a separate mother in law building with garage space for the hubby and so much more. The house is beautiful, built as though someone had us in mind. I could literally go on about all of our plans for this piece of heaven, but today I'm going to write about our experience with raising turkeys for the first time.

For the last three years I've raised close to three dozen chickens of various stages (this year was my first with chicks - The Pierogie Peepers) and we decided that we also wanted to give turkeys a try. I had only tasted an all organic pastured Thanksgiving turkey once, though it was long before I even cared about what that truly meant, but both my husband and I knew that this was something that a lot of people raved about so we decided to give it a try and see if it was something for us.

For simplicity's sake, I decided to get turkey poults (the term for baby turkeys) from our local farm store, and they offered only one variety this year; broad breasted whites. Turkeys come in a huge variety of breeds and of the domesticated type you can divide them into two groups (just like chickens) - commercial and heritage breeds. A heritage breed bird is one that is considered old school; the breed was established prior to the 1950's (and hasn't been subject to the commercialized selective breeding), takes longer to mature and still mates naturally. A commercial breed is pretty much the opposite - a domesticated bird that has gone through the selective breeding process over generations, probably starting around the 1950's, to grow bigger, faster and easier. Broad breasted white turkeys fall into the commercial category. They mature in as little as 16 weeks! On the other hand, many heritage breed turkeys take well over a year to fully mature and reach their maximum size. Some people say that there is a marked difference between the taste of a commercial versus heritage bird, even those that are fed the exact same food and grew up side by side.

A broad breasted white turkey (which is the exact same thing as a broad breasted bronze, they are just different colors) was developed to grow a huge amount of breast meat. Because that's what we Americans love. The white color was developed because it looks more sterile. Commercial birds were bred to grow big and fast, so interestingly enough most of them have no idea how to mate and due to their size are incapable of it (even if they were given a life long enough to act). It's my understanding that all commercially hatched turkeys are a product of artificial insemination.

There are many reasons why you would choose between a heritage and commercial breed for poultry, but mainly what it came down to for us was that this was our first year (so we took what we could easily get), these birds were intended for Thanksgiving dinner so they did need to mature in a relatively short amount of time, and we were curious to see how big it really would get.

So on June 2 this year our little gang of three turkeys arrived at Two Tire Fire Farm and they were raised in the brooder next to The Pierogie Peepers (the 11 chicks that we got a few weeks earlier). In comparison to raising chicks, the poults were a lot more slow to get up to speed. They were about twice the size of a chick of the same age, but didn't have the inherent knowledge of how to eat or drink. Truly, people who raise turkeys will tell you that either you put a chicken chick or two with poults to show them the ropes, or you have to dip their beak into the food and water for a few days to show them. The phrase that turkeys are dumber than a box of rocks tends to be true in my experience.


We chose three turkeys because we wanted one for our Thanksgiving dinner, a friend asked us to raise one for them and I got a third one "just in case," because again.. turkeys aren't very smart and don't have the best resilience to disease and honestly, begin to look mighty tasty to predators once they get a bit of meat on them.

Before they were a month old it was pretty clear that we have one tom and two hens. I was really hoping that we had two toms so that the other family could have a nice big bird as well, because we had no clue on what to expect for how big they would get. They graduated from the brooder with a heat lamp by 5 weeks to living exclusively outside in a mobile turkey "tractor" (a pen that we can move around to give them free range of grasses, bugs and dirt but keep them protected).


I found that they really did not graze and forage on grass nearly as much as chickens would in that same space. It would take 2-3 days for them to eat all the grass in the footprint of their tractor whereas it would easily be done in a day with chickens. Turkeys, at least mine, were incredibly picky about their food. I had started to introduce leaves and fresh grass into their brooder at an early age, but they never cared for it. My chickens get tons of kitchen and veggie scraps in addition to their feed and getting to forage in their own tractor, but the turkeys really wouldn't touch it. On a really hot day I brought half a watermelon to them (a real treat!) and they cautiously circled it for hours. Had this been in the chicken pen - it wouldn't have lasted 5 minutes.  Finally I dumped some of their pellet food on top of it and they tried it. ???

I found that it was incredibly difficult to source organic turkey feed in my area. It was completely unheard of. Raising an organic pastured turkey was my highest priority because I'm well aware of the benefits of this standard of food, although the cost is higher. I am thankful that this financial cost is something that we can afford because it's important to my husband and I.


I was lucky enough to find some organic meat chicken food ("fryer ration") and fed that to them until I found a feed store about 3 hours away (luckily, in the town that my parents live). The reason why choosing your feed for your turkeys is important is because of the protein level. More protein = faster growth, just like any other animal. Turkeys are recommended to have between 19% to 30% protein in their feed. Meat chicken feed tends to be at about 18-21%. However, more protein is not always better. If you feed any animal too much protein too fast they won't be able to healthily support their own weight. The horror stories that you hear about chicken production farms can be true - chickens whose legs break at the end of their life cycle because they simply cannot support their own weight. They've been stuffed too much. That was my fear for the turkeys. So I decided that a gradual increase in protein would be a safe bet. They were fed an 21% protein diet (on CHS Payback Organic Fryer) until they were about 12 weeks old, when I found that Modesto Mills has an organic turkey ration that is at 28%. At 19 weeks (about 5 weeks before slaughter) I added organic cracked corn into their diet, which is a "finisher." The finisher feed, in addition to the regular feed, helps finish off the meat but giving it an extra bit of fat which will add to the flavor. They got about 40 pounds of cracked corn in the final 5 weeks. The three turkeys went through 160 lbs of feed and 40 lbs of cracked corn in their 24 weeks of life.


We slaughtered them the Saturday before Thanksgiving. A friend who has several years of farming experience came to help out, as well as the husband of the family that we grew one of the turkeys for. Our local feed store rents a "poultry processing kit," which includes a stand, kill cones and basin, a scalder and a plucker.  My husband had slaughtered turkeys and chickens "by hand" in the past and it was a time consuming process. The kit cut it down to processing 3 turkeys and 6 roosters in under 3 hours. Because of the ease of this process, the whole experience was quiet, humble, humane and respectful. I wasn't sure if I wanted to watch the process because I was worried that it would be too hard to watch, but it really wasn't that bad. I was the primary caretaker for the turkeys and was reminded every day that their lives have an expiration and that their sacrifice would be respected. At the last minute I decided that because I had taken on the responsibility of raising them I should see it through to the end. I watched; I don't think I will ever want to participate, but I'm glad that I know have an understanding of the process.


There are several ways to kill a bird, but the way that we did it was by placing the bird head first into the kill done and slitting the jugular and allowing the bird to bleed out. It only takes a few minutes and the bird does not struggle. After it is gone, you place it into the scalder to get the feathers to come off easily. Scalding the bird loosens the pores and regardless if you have to pluck by hand or have a machine that does it - it's easier. A plucker essentially looks like an open washing machine that spins the body around with some rubberized nubs that pull the feathers off for you.  We placed two roosters at a time into the scalder and plucker but the turkeys were way too big.

After the feathers are removed you remove the head, then the neck, feet (we saved them for our dogs!) and internal organs. Because I was only watching, I can't give you a tutorial on what exactly to do. You then cool the body and you're good to go!

So what did our birds weigh in at? That was my most anticipated surprise!!

Our tom - 31 1/2 lb and the two hens were 21 and 22 lbs.


I brined it in a Costco brine mix (it had apples, cranberries, vanilla bean and other spices) for about 48 hours and I made an herbed garlic butter to slather on top and under the skin. It was stuffed with my mom's stuffing. For a bird that size we expected it to take just over 7 hours to cook at 350 degrees. So I prepped it the night before Thanksgiving and got up at 5am to put it in the oven. It ended up being ready (165 degrees at the thickest part of the thigh) almost an hour and a half early. THAT was a surprise! I read that pastured turkeys take a little bit less time but I wasn't expecting that big of a difference. The other two turkeys also took less time than expected.


And the verdict on the flavor? Even the most skeptical of family members (we invited almost 20 adults to get this bird eaten, after all!) agreed that this was much better than store bought. We still had a ton of left overs that were used for turkey sandwiches, pot pie and a few other things. I simmered the carcass to make broth that I pressure canned with a Black Friday purchase.

It's very likely that we'll grow a turkey or two every year from now on. They didn't take any more work than my chickens do and the pay off was worth it for us. It was very personally satisfying to see 6 months of work bring so much of our family together for a great meal and wonderful memories.

Tuesday, August 16, 2016

Dahlia Cloth Review - New mama cloth line from Buttons Diapers! {Giveaway}

After reading about Dahlia Cloth, don't miss out on the Tula giveaway!
______


It's no secret that I'm a big fan of cloth diapers - they've saved our family countless dollars (especially because they were able to be reused for subsequent children, including a niece and nephew!), they feel better for baby and they are just plain CUTE. There are tons of reusable cloth products that are gaining popularity in the recent years, but it wasn't until the birth of my second child where I dove head first into the world of reusable cloth menstural pads.

Why buy reusable menstrual pads? It's pretty much the same reason why you would choose cloth diapers over disposable, and honestly most disposable products period. They save me money, they are soft and comfortable, they can be pretty, they are much nicer to the environment and you will hear this from a lot of cloth pad users - your period is actually lighter. There are many speculations as to why, and one might call me a conspiracy theorist, but part of me wonders if all those extra chemicals in disposable products affect the menstrual cycle to last longer because that means you need more of their products and they get more money. Even disregarding that, cloth is a beneficial alternative because you are now removing that chemical contact with your body. Montsano stays out of my vagina

Cloth menstrual pads go by many names; mama cloth, R.U.M.P.S. (re useable menstrual products), moon pads or moon rags. They are useful for women through many phases of life - menstruation, post partum healing, urinary incontience or simply as panty liners. They come in different lengths, shapes and materials. 

Many women get a little bit of an "ew" factor when they think about how they will have to care for these pads. Honestly, it takes almost no special care at all. Depending on how many cloth pads you have, you can wash them all at the same time at the end of your cycle or you may have to wash more often to have what you need. I recommend keeping a small wetbag around to place soiled pads into until you are ready to wash.

If you are currently cloth diapering - just throw them in the same load as your diapers. If you aren't, you can wash them by hand with warm water and air dry or wash them in the washer with warm water and dry them on low. I've washed mine with dark towels or sheets without issue. It's also recommended that you rinse them out prior to storing them in the wetbag to prevent staining and making it easier to wash.  It's really not rocket science! And if you fall in love, which I am sure you will, you'll grow a stash that will hopefully be enough for one cycle so all you have to do is wash them all at the end and put them away for next month.

So when Amy, the owner of Buttons Diapers, whom I know personally and love her line of cloth diapers, approached me with the opportunity to review her brand new line of cloth menstrual pads called Dahlia Cloth, I jumped for joy! I've been a fan of Buttons Diapers for as long as they have been on the market and knew that the attention to quality, price point and useability from Amy and the Buttons Diapers team would be evident in this expansion of their lines. 

The Dahlia Cloth pads come in three lengths - small (8.5"), medium (11") and long (13.5"). The size you will need may depend on what part of your cycle you are using them for and your own body shape. I like to use longer pads for my heaviest days, overnight or post partum. Shorter pads are nice for the start and end of your period. It's nice to have a variety of lengths to choose from, because for me I have some cycles that are heavier than others, and I can adjust which pads I'd like to use that day.

Dahlia Cloth pads are simple to use. Lay your pad down onto your underwear, just like you would for a disposable pad with wings, with the absorbant side facing you. Tuck the wings under your underwear and snap together. You can expect to wear a cloth pad anywhere from a couple hours to up to five during the day, or longer and more absorbant ones for overnight. 


Want to know a cute little secret that I love about Dahlia Cloth? If your baby is also wearing Buttons Diapersonly you would know that you and your baby may be matching that day! When I look at my cloth pad stash a smile crosses my face because I get to choose between many different colored patterns or prints. Dahlia Cloth currently comes in Afternoon Tea (a floral print), Meadow (leaves) and Midnight (black). 


The pad is made up of several different layers that play an important role to being an effective pad that is comfortable and leak free. The top layer (which comes into contact with you) is a soft fleece. The core of the pad is absorbant microfiber. It is backed by leak-proof PUL (poly urithane liner), which are those prints that I mentioned above. PUL Is the same material that makes cloth diapers and wet bags leak proof.  Being a Buttons Diaper user I immediately saw that the same materials are used for Dahlia Cloth. I can rest assured that if these materials can handle the dirty work that my children do to them, they can certainly handle mine! 

I tried the medium and long length pads and saved them for my heaviest flow days. They felt comfortable, didn't slide around in my underwear and never leaked. I can understand the trepidation that a woman feels when trying out a new menstrual product - wondering if they can leave the home in fear of having an embarrassing leak. I can say with confidence that I didn't have any worries about that happening. 

For this review I had a couple of my mama cloth friends chime in on their thoughts of Dahlia Cloth too. Both of these friends are experienced mama users; all three of us actually worked on The Pad Project that I shared about with you in the beginning of the year. Luda is primarily a Cup user but wanted to have some pads for "just in case," and she loved how thin and comfortable Dahlia Cloth felt. Kelsey was so excited to see the beautiful prints on the pads, "It truly makes a difference for me having something beautiful that time of the month. I am a mom of three boys and trust me my pads are the only place I get to see flowers and the colors pink and purple in my house!" Kelsey tends to have a really heavy flow and she found that the large size pads worked great for her during the day and night.


You can purchase them through Buttons Diapers and on Amazon.

Buttons Diapers is excited to offer Pierogie Mama readers with the chance to win a 3-pack of Dahlia Cloth pads, in their choice of length (small, medium, long) and print (Afternoon Tea, Meadow or Midnight). Enter via the giveaway widget below, see rules for details.


Disclosure: This giveaway is hosted by The Pierogie Mama, the prize is sponsored by Buttons Diapers. This post may contain affiliate links. All opinions and images are my own. I received product in exchange for my honest review, no other compensation was provided. Please see the giveaway widget for full details and rules. 
Please email me at thepierogiemama@gmail.com if you have any questions or would like to see your product featured. 

Thursday, June 16, 2016

The Pierogie Peepers vol 1.

Thanks to this month's Pierogie Mama sponsor,
here's a fun way to sneak high protein navy beans 
into your active toddler's diet!
____________

Almost 2 months ago, my husband and I moved our family about an hour north to beautiful Skagit County (Washington) where we get to live in the home of our dreams. It was the house we had prayed for and now we get to realize our dream!

As many of you know, I am also a chicken mama and have had a small flock of backyard hens for almost 3 years. Once we moved to our new house and were no longer constrained by city regulations, I went a little chicken crazy. Just a little. We went from 7 hens to double that in a very short amount of time. That term is called "chicken math."

Say hello to the 11 + 3 Pierogie Peepers! We call them 11 + 3 because I've got 11 chicks and 3 turkey poults (the word for baby turkeys).


These guys are quickly growing and the super cute chick phase was short lived. But I had some fun while they were cute and fuzzy!


A photo posted by Bianca @ The Pierogie Mama (@thepierogiemama) on

But adolescence is rarely cute on any creature and that's kind of where we are at right now.  Almost immediately baby chicks start to lose their fuzzy baby down and grow in their feathers. We are in a middle stage where just a little bit of down remains.


Out of all of the Peepers, Babcia the Polish chicken is kind of my favorite. She's been the most fun to watch as she feathers out. Polish chickens are bred to have a huge 'fro, and are one of the most fabulous in the chicken world. You might wonder where this name came from. "Babcia" in Polish means "Grandmother," which is what my daughters call my mom. My mom, bless her heart, I love her so, but the 'fro on Polish chickens reminds me of my mom on a bad hair day.


Most of the time when you buy chicks from your local Co Op or farm store they come "sexed," meaning you have about a 90% chance of knowing that the chicks you've selected are girls. Some breeds (specialty, mostly) come "straight run," meaning they were not sexed and you have a 50/50 chance of pullet vs roo. Babcia came as a straight run and I go between wondering if she is a girl or a boy. I am really hoping she's a girl. I also got my four black copper marans from a friend who breeds them as straight run and so far I think I've found that two out of the four are roos. It's still too early to tell at 4 weeks, but there are sometimes indicators (comb size, usually) that may indicate boys. My guess is that #1 and #4 are boys.


And that's pretty much where we are at! To answer the elephant in the room - yes, the turkeys are for us to eat. My husband will be butchering them sometime between September and November, depending on their size. It's not an aspect that I look forward to with excitement, but having the personal satisfaction of growing our own meat, giving the turkey a good life and an honorable death will be a part of our life here on our new "farm."

Tuesday, March 15, 2016

Old Fashioned Pound Cake Recipe


Having backyard chickens, I can go through feast and famine with eggs. Some weeks my family can't get enough of them and the girls can barely keep up production and other times they are popping those eggs out like clockwork but the fam is kind of over it. So what do I do with all those egg-stra eggs?

One of my favorites is a serious good old fashioned pound cake. This cake is dense, it reminds me of the Polish babka cakes that I get to enjoy every once in a while. It's perfect for pairing with an evening cup of tea with your bestie. Or, pretty much any other time of day.

My favorite part is the massive amount of eggs that it takes up! Because my eggs are from my own chickens who get to free range - meaning they go out into my yard and eat up bugs and weeds - the egg yolks are an intensely glorious orange and are packed full of protein. The natural color of those yolks makes this cake a deep yellow without having to use any food dye. This cake is legit!

I also adapted this recipe to use doTERRA lemon essential oil. This reciepe doesn't require you use to lemon essential oil; in fact you don't have to use lemon at all, but I like the depth of flavor that it adds. If using essential oils isn't for you, substitute the oil for the zest of one lemon in the icing.

Pound cake:
Ingredients:
1 lb of sugar (3 1/2  cups)
1 lb of butter, softened (4 sticks)
1 lb of flour (4 cups)
1 lb of eggs (10 eggs)
4 drops of doTERRA lemon essential oil
1 1/2 t almond extract

Directions:
1. Preheat the oven to 350 degrees F.
2. In a large bowl cream your 4 sticks of softened butter with 3 1/2 cups of sugar, until light and fluffy. Scrape down the sides.
3. Add one egg at a time to your butter mix. Mix well and scrape down the sides often.
4. In 3 stages, add the 4 cups flour to your mixture.
5. Finally, add the 4 drops of doTERRA lemon essential oil and 1 1/2 teaspooons of almond extract.
6. Pour into a pre-greased 10 inch bundt pan.
7. Bake for 60 minutes, cover with tin foil and bake for a final 30 minutes.
8. Invert and allow to cool completely.
9. Glaze it! Recipe below.

Glaze recipe
Ingredients:
1 1/2 c powered sugar
3T heavy cream
1 T light corn syrup
1/2 tsp vanilla
2 drops doTERRA lemon essential oil

Directions:
With a high speed mixer, blend all of the ingredients together. It should be fairly thick. Pour over your cake and allow to set.

Wednesday, January 13, 2016

Guest Post: A Day In the Life: Homesteading with Kelly


Our little family of four lives on a five acre plot in rural Northwest Washington. We currently have 27 chickens, two turkeys, a horse, two doelings with the intent to milk, two barn cats and a sheepdog. My husband and I have always believed in teaching our children to respect the land and to respect themselves and others. To us, this means being aware of what goes into our bodies and teaching our children to live thoughtfully and with purpose. This is the Homesteading Life.

Very little goes to waste on our homestead. We grow much of our own food in raised  beds and plan our meals accordingly. Canning and freezing our food for the colder months cuts down on what we have to purchase. Whatever food waste is created in this process is either composted or given to the chickens and turkeys to eat. Our poultry flock provides us with eggs and meat. Their manure is composted for next year's garden.

The entire family is involved in this process. Our (not so) little Farm Boy collects eggs and takes the compost to the chickens each day. Our little Farm Girl feeds the chickens and feeds our sheepdog, who helps to guard our flock. Both children are frequently involved in the cooking and canning. We all do farm chores together until all the chores are done. They know where their food came from because they helped to harvest it or raise it. They both understand that all animals are treated with respect, no matter what their purpose is, as pet or food.

There is beauty in living simply. Even though we work hard to live this life, it is immensely satisfying to know that we are teaching our children values that they are unlikely to learn elsewhere: The importance of clean eating, the benefits of a sustainable lifestyle and the power of family.


Kelly is a licensed mental health counselor and stay at home mother. Aside from homesteading, she enjoys crocheting, baking, and riding horses.

Friday, January 1, 2016

Guest Post: 5 essential oil diffuser blends to start the new year strong


5 essential oil diffuser blends to start the new year strong

by Rachel Zupke

Hi there! My name is Rachel and I am excited to be here at The Pierogie Mama sharing a bit about essential oils with you! If you have any questions about oils after reading this, please feel free to contact me or head over to my blog for more info.

The new year ushers in a whole host of different emotions. Depending on how your holidays went, the turning of the calendar is something that most of us use as a motivation to usher in a new, positive habit. You might be breathing a sigh of relief that normal life is resuming again, coming down off a high from having a great time with family and friends, wishing you could go back and do it over again, or somewhere in between…regardless of your circumstance, let’s press the reset button together.

Using essential oils aromatically gives you and your family a natural boost through this second half of winter. The following blends involve 4 to 6 drops total in your diffuser making them an economical way to use essential oils. I also chose to share blends that include more commonly used oils; if you already use essential oils, you’ll most likely be able to make them with what you have on hand or, if you haven’t started using essential oils yet, you can make them if you purchase a collection of oils from various essential oil companies. For diffuser recipes that call for blends, I’ve given the common name*.


Fresh and clean

2 drops Peppermint

2 drops Rosemary

1 drop Melaleuca

Aid respiratory function with peppermint, protect against illness with rosemary, and promote cleansing with melaleuca. This blend is great when you want your environment to feel crisp and airy.


One-two punch

2 drops Protective blend

2 drops Cleansing blend

A little run down? Boost your overall health by diffusing a protective blend to support your immune system and cleanse your environment with a purification blend.


Immune support

2 drops Lemon

2 drops Invigorating blend

1 drop Frankincense

1 drop Oregano

Support your hard working immune system through the harshest months of the year. Lemon helps with environmental threats and promotes a sense of well-being, invigorating blend helps with stress, frankincense supports specific components of immune system function, and oregano aids respiratory function.


Get stuff done

2 drops Invigorating blend

1 drops Lemongrass

1 drops Peppermint

When you have a lot to get done but lack the motivation or focus, try this blend! Reduce stress and support your emotional health with an invigorating blend, promote awareness and enhance focus with lemongrass, and aid memory and mental performance with peppermint.


Relax

3 drops Grounding blend

1 drop Lavender

Harmonize your body systems and promote a sense of balance with this relaxing blend. A grounding blend promotes calmness, peace, and centering while lavender’s calming and sedative properties help lift feelings of anxiety.


I hope these diffuser blends are helpful through the potentially dreary months of late winter. If you’d like to learn more about essential oils and how they work, I’m teaching two *free* online webinars over the next few weeks. I’m a former high school science teacher so teaching webinars (and in person classes) is a way for me to keep doing what I love (learning and teaching) while applying it to my everyday life, and, hopefully, yours! Hop over to my blog, Mason Jar Values, for more information. I’d love to see you there! And if you have any questions, please don’t hesitate to email me!


Happy oiling!


~Rachel at Mason Jar Values


*Brands like doTerra, Young Living, and Native American Nutritionals (among others) have similar blends that go by different names but cover the same bases. For example, if you are stressed and need to feel centered and calmed, you’d want to use a grounding blend. DoTerra calls this Balance, Young Living calls theirs Valor, and Native American Nutritionals calls it Aligning.

ShareThis

Related Posts Plugin for WordPress, Blogger...