Showing posts with label bread. Show all posts

Friday, April 3, 2015

Catch the moment: Week 13 (and some extras?)

Somehow I got off on my counting. I don't know. So today you get some bonus pictures! Woo hoo!

 The most precious jewels around a mother's neck are her children's arms.
 This is quite possibly the most beautiful rise that I've gotten out of my home made bread.
 A mini heat wave in March in Washington means it's like 60 degrees. So out comes the sprinkler!
 Another warm weather activity..side walk chalk! And three cheers for Ruby finally being ok with being put on the ground outside. Only if there's chalk that she can taste, color with and put into the bucket.
 Miss E turned 4 and we came over for a Princess / Easter egg hunt birthday party. What a blessing this friendship has been to Penny.
 I snagged my niece and nephew for the day while their parents and my husband did some renovating. We drove to grandma and grandpa's house. Having two rear facing kids, two forward facing kids and a 3rd row makes life so much easier! They all just entertained each other.
 My naptime project for the last week was clearing out the garden beds on the front and side of the house, which had been neglected for a LONG time by the previous owners. All of the extra grass and weeds went to my chickens, who have been on lock down from free ranging because quite frankly, I would prefer for my kids to not step in chicken poop when they're running around in the grass during our gorgeous weather ;) When the rain returns, the girls will be let out again.
 We've making use of our fabulous RadioFlyer Wagon (review!) and Penny insisted to pull Ruby around. Fine by me! We made a quick Buy Nothing Project delivery to our neighbor.
 This is the science project of my life. Why do some egg dye colors make bubbles on the egg shell?
It was a hard, hard day. So hard. One of the hardest days of my mothering career. Nothing went right, my voice was raised too often and too many tears were shed by all three of us. So I pulled out one of my favorite dinners to console myself.. and I didn't care if anyone else liked it either. Thanks, The Kitchn, for Spaghetti alla Carbonara

Follow along on Instagram daily!

Friday, December 12, 2014

Healthy Transformations

Today's discussion is sponsored by Sara Lee®. Read on for my transformation, learn about 45 Delightful People and healthy options from Sara Lee® Delightful Bread!

Tracking Pixel
Is it an understatement to say that this year has been a year of big changes around here? But isn't it for everyone, every year?

With Ruby's birth in March and Penny turning 2 in the same month, I learned quickly that I had to re-evaluate what is important to me and how to best manage my time. After all, not only did I need to survive the sometimes harrowing journey of motherhood, I wanted to thrive. I didn't want this year to be a "hard year," instead I focused on it being a "learning year." And that meant making some serious changes.


The biggest change that I made is accepting that I can't do it all myself. I can't always be the #1 caretaker (as I had tirelessly been with Penny), I finally admitted that I'm not a tidy person and never will be, laundry (especially cloth diapering 2 at the same time) will always be a daily chore and honestly (as much as I take true joy and pride in it), not every meal snack and treat will be made from scratch. If I wanted to maintain my sanity, keep a sense of myself, be a good wife and mom, I needed to just let it go and accept help when it's offered...

Can't all moms take a lesson in that? It's so hard!

Many of us use new year resolutions as a way to change for the healthier. Eat better, go to the gym more often, lose that holiday weight. This year's goal will be for an improvement in mental health. I will take time for myself more and not only accept help but ask for it. My hope is that I'll be a less-stressed mom and it'll show in my parenting and relationships.

Do you have a transformation that you want to share? 
Enter it in the Sara Lee® 45 Delightful People campaign and automatically get a free t-shirt and possibly be one of the 45 winners semi-finalists or the grand prize winner of $4,500!

If you're looking for ideas for other healthy transformations, check out Sara Lee® Delightful Breads. They are delicious and only have 45 calories per full-size slice. You can find them in oatmeal, whole wheat, Healthy Multi-Grain and wheat. They are heart-healthy and provide an excellent source of fiber and best of all...no artificial colors, flavors or high fructose corn syrup.

Disclosure: This is a sponsored post written by me on behalf of Sara Lee®.

Wednesday, April 9, 2014

Sour Cream Zucchini Bread with Coconut Oil

This is a revamp on my previous recipes of sour cream banana bread and sour cream pumpkin bread. Seriously, what else can I mix into this fantastic recipe that won't be a win?

Yields 2 loaves

You will need:
non-stick cooking spray
1/4 c of sugar with 1/2 tsp ground cinnamon
1/2 c softened butter (or 1/2 c Tropical Traditions Extra Virgin Organic Coconut Oil)
1 1/2 c sugar
2 eggs
2 c shredded zucchini (drain for 30 minutes)
2 c  sour cream
1 tsp vanilla extract
1/2 tsp ground cinnamon
1/4 tsp salt
1 1/2 tsp baking soda
2 1/4 c flour
*Optional: Toppings such as more cinnamon-sugar, candied pecans or chocolate chips.

You will do:
1. Preheat your oven to 300 degrees.
2. Spray 2 bread pans with your non stick spray.
3. In a small bowl mix the 1/4 cup of sugar with the 1/2 tsp of ground cinnamon. Dust onto the greased pans.
4. In a stand mixer cream butter and remaining sugar together. Add eggs, zucchini, sour cream, vanilla, and cinnamon. Mix until well blended.
5. In a separate bowl, combine flour, baking soda and salt. Slowly incorporate into the zucchini mixture.
6. Divide batter between your pans.
7. Top with cinnamon-sugar, candied pecans or chocolate chips.
8. Bake for about an hour (but check at 45 minutes), or until an inserted toothpick comes out clean.

To freeze extra loaves for later:
  • Allow the bread to cool off completely
  • Wrap tightly in plastic wrap
  • Bag in a large freezer bag
  • Freeze
  • Use within 3 months

Friday, October 11, 2013

Sour Cream Banana Bread with Coconut Oil {Tropical Traditions Organic Coconut Oil Review & Giveaway}


I'm a big fan of butter. Don't get me wrong. Butter just makes things better. Better with butter. But with heart disease being fairly prevalent in my husband's side of the family, I've really got to tone it down. After doing a little bit of research, I found that coconut oil is a totally viable and healthy alternative to butter in many aspects of cooking. You can substitute it as a frying oil, buttery spread and in baking. Tropical Traditions has graciously provided me with a jar of their Gold Label Extra Virgin Organic Coconut Oil so that I could give it a try with my tried-and-true sour cream banana bread recipe and we were all pretty impressed with the results!

Tropical Traditions Gold Label Virgin Coconut Oil is certified organic & traditionally made. This coconut oil meets our strictest standards and is handcrafted by family producers in the Philippines using traditional methods passed down from previous generations. Recent studies show that traditionally-made coconut oils have the highest amounts of antioxidants. Tropical Traditions also has tons of info if you want to learn what virgin coconut oil is and how to use coconut oil

You will need:
non-stick cooking spray
a mixture of 1/4 c of sugar 1/2 tsp ground cinnamon for dusting
1/2 c Tropical Traditions Extra Virgin Organic Coconut Oil
3/4 c raw honey (or 1 1/2 c sugar)
2 eggs
3 very ripe bananas
2 c sour cream
1 tsp vanilla extract
1 tsp ground cinnamon
1/4 tsp salt
1 1/2 tsp baking soda
2 1/4 c flour
optional: Add 1/4 cup of mix-ins such as chocolate chips, golden raisins, organic shredded coconut or candied nuts).

You will do:
1. Preheat your oven to 300 degrees.
2. Spray 2 bread pans with your non stick spray.
3. Dust both pans with the cinnamon-sugar mix. You don't have to use it all, just enough to lightly coat the pan.
4. In a larger bowl, cream the coconut oil and remaining sugar together. Add eggs, bananas, sour cream, vanilla and cinnamon. Blend until well mixed.
5. In a separate bowl combine flour, baking soda and salt. Slowly incorporate into the banana mixture.
6. Divide batter between your pans.
7. Bake for 50-60 min, or until an inserted toothpick comes out clean.
8. Allow to cool and enjoy with a smear of coconut oil.

Ready to bake some of your own banana bread with coconut oil? I thought so! Check out the giveaway below to enter to win a jar of coconut oil from Tropical Traditions. (ps - if you just can't wait - they are running a BOGO sale on their quart sizes of Gold Label! That's $20 for 2 quarts of amazing coconut oil!)

This giveaway is over - thanks to all for entering! 
Keep an eye out for more Pierogie Mama Giveaways.

Big long scary disclosure: I am not a health professional! Please consult your physician or other health official regarding any questions regarding health claims with any products. Nothing I have written here is intended to treat, cure or otherwise prevent any disease. I received a free sample of the product from Tropical Traditions for the review using Tomoson.com. Regardless, I only recommend products or services I use personally and believe will be good for my readers and I was under no obligation to review it if I so chose. Nor was I under any obligation to write a positive review or sponsor a product giveaway in return for the free product. This post contains affiliate links.   If you order by clicking on any of my links and have never ordered from Tropical Traditions in the past, you will receive a free book on Virgin Coconut Oil, and I will receive a discount coupon for referring you. Giveaway is open to US residents, 18 years of age or older. Winners will be contacted via email and have 48 hour to respond before another winner is chosen. The Pierogie Mama is not responsible for prize fulfillment. 

Friday, September 13, 2013

The Recipe Crucible: Pillsbury Biscuit Turkey & Muenster Grilled Sammies


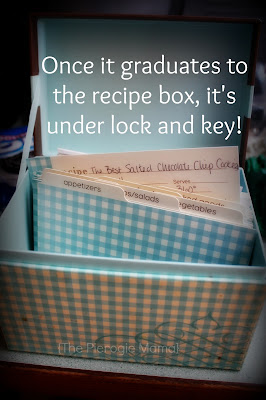
A little Bianca factoid...yes, I keep a very healthy Pinterest account. But when a recipe has been tried and true, it makes its way into my legit recipe box. It's written on paper and hopefully immortalized for the next 50 years (or more, if one of my children end up loving cooking too!).

September has always been a time of transition for myself and many other families. It's the start of school, obviously a change in season and it always seems like I am moving in September / October. I'm going to say this one last time - this better be the last time we move for like 15 years!! ;)

During this time of transition families are busier than usual and honestly the time and energy spent in cooking sometimes takes a nosedive. Our family doesn't have anyone starting school (not for a couple more years), but the transition of moving into our new home and the renovation taking place in the kitchen has definitely made things a little tighter, less comfortable and not as easy to prepare full on dishes like I normally like to.

So this little quick and easy recipe that I'm going to share with you below is in the beginning stages of this crucible - initially saved via the internet/this blog, and maybe one day will graduate into recipe cardhood.

Originally adapted from Grands! Grilled Cheese Sandwiches.


You will need:1 can (16.3 oz) Pillsbury® Grands!® refrigerated buttermilk biscuits (8 biscuits)
8 thick slices of Muenster cheese (I went straight to the Deli counter and asked for nice thick slices)
1/2 lb of pepper crusted sliced turkey breast meat (also found at your Deli counter)
honey mustard
extras: avocado, tomato, bacon
Makes 4 sandwiches


You will do:
1. Heat a non-stick skillet on high heat. 

2. Meanwhile, flatten the biscuits into discs, similar to mini personal pizzas. The key here is to get them nice and thin, otherwise you'll end up with regular biscuits! You can stretch them like pizza dough or use a rolling pin.

3. Once the pan is hot and the biscuits are flat, add one or two biscuits at a time to the hot pan. Cook for 1-2 minutes per side. Once it is brown (like a pancake) flip it over and cook the other side. Set aside when cooked.
4. After the biscuits are cooked, layer on a spread on a little bit of honey mustard, add two slices of cheese, some meat and any of your additional toppings. Sandwich together.
5. Return the sammies to the hot pan, adjusting the temperature to medium/low so that the cheese can melt without burning the biscuit. 
6. Bon appetit! These are so simple that you can really adjust them to fit whatever you have in your fridge for a hot sandwich.


What would you fill your sammy with?
Download the Pillsbury recipe booklet for more easy recipes and comment with a Pillsbury Grands! Biscuits recipe you'd love to try!


I was selected for this opportunity as a member of Clever Girls Collective. The content and opinions expressed here are all my own and are not indicative of the opinions or positions of General Mills. Compensation was provided by General Mills via Clever Girls Collective.

Friday, August 23, 2013

Monthly Its: Aug

This month I want to introduce to you StarGazer soaps - some beautifully awesome delicious smelling soaps that I will be writing about (and giving away!!) in the coming weeks. Check out her youtube page for some fun videos on how she makes her beautiful soaps. Each one is unique - you won't find soaps like these anywhere else!


My name is Nicole, and I am a soap maker! 
I began making soap to try to save my family some money.  As a busy stay at home mom of 5, every penny counts!  While doing my research, I learned all about commercial soap, and what they put in it.  This reaffirmed my decision to make my own soap.  I didn't want my children bathing in chemicals.  I didn't count on how much I would fall in love with soaping.  When I make soap, it is always a surprise.  Each bar is unique, and one of a kind.  Since I began soaping, I have never looked back.  I couldn't imagine spending money on commercial soap again.
From my family to yours, 
we hope you love our soap as much as we do!

Nicole Farrell, Owner & Creator


Ok some of my favorite posts from the last few weeks:

You read about my experience with bed sharing (and how we're transitioning to more independent sleep with night weaning), here is a story from another mama who's family of 4 cosleeps.

Tantrums are no fun. Penny has started to simply drop to the floor in defiance, but there are times where her frustration comes out in angry, swinging hits. These 6 tips for gentle responses to these big feelings are a great way to help calm our little ones.

Did you have a special evening every week that was reserved for family dinners? The older I get, the more I really appreciate them for what they are. As Penny grows, I hope that we can arrange for extended family dinners once a month, so that she and her cousins can reconnect on a less formal basis that holiday dinners.

Oh em gee - Pizza braids! Check out my homemade pizza pinterest board for some pinspiration :)

Finally, who can resist an easy Pioneer Woman recipe? Cinnamon crisps are an anytime snack in my book, but how about dessert for the next taco night?

Thursday, February 21, 2013

Baked Spaghetti Pizza

OH NO SHE DIDN'T!

Yea, I went there. 

I've combined two of America's favorite dinners into one. Spaghetti and Pizza.

I came across this idea through Pinterest..Of course, there just aren't any unique ideas out there anymore, are there?

Einstein, Pinterest was obviously a glimmer in your eye long before 2009.

Back to food.

To my credit, I don't think I've ever found a recipe for calzone style baked spaghetti. This recipe features home made pizza dough vs using store bought frozen bread dough. It made a big difference.

It's a great way to A) feed a bunch of people B) feed two people to the point of a food induced coma or C) use left over spaghetti.. which lets face it, doesn't happen too often. At least not in my house. I think my husband was Italian in a previous life. He will eat pasta 8 nights a week if I let him ;)


You will need:
Basic Pizza Dough
Corn meal
1/2 package of spaghetti noodles, cooked all dente and drained
Pasta sauce (I recently discovered Safeway's O organic roasted garlic sauce.. So surprisingly good!)
Shredded Parmesan cheese
2 T of melted butter
1/4 t of garlic salt
Preheat oven to 375°F

*Note: This recipe makes a loaf that can be shared between two people. You'll have left over pizza dough, which you can use to make more baked spaghetti pizza or refrigerate and make your own pizzas later!

You will do:
1. Prepare the pizza dough ahead of time. It will need to rise for about 90 minutes, or until the dough has doubled in size.
2. Combine your cooked spaghetti noodles with pasta sauce, using however much sauce you normally use.
3. Divide the pizza dough into two pieces. On a floured surface, roll out one half into a rectangle, short side facing you. It should be roughly 18 - 24 inches long.

4. Sprinkle corn meal onto a baking pan lined with parchment paper.
5. Transfer the rectangle onto the parchment paper or stone.
6. Carefully dump the spaghetti onto the dough so that it is roughly in the center 1/3 of the dough.

7. Top with the shredded cheese, to your liking. The cheesier the better!
8. Using a knife or kitchen scissors, cut horizontal strips up both of the long sides of the dough. They should be about 1 inch wide.
9. Fold each strip at a diagonal and alternate sides, so that it looks almost like a shoe-lace pattern. Tuck the ends of the loaf in.
10. Stir together the melted butter and garlic salt. Brush onto the top of the loaf.
11. Transfer into the preheated oven. If you are using a pizza stone, I slide the loaf with the parchment paper onto the stone so that the tomato sauce doesn't get all over it.
12. Bake for ~20 minutes, or until the dough has a good crust to it. I baked my first one for about 25 minutes and it was a little too much.
13. Remove from the oven and let cool! Cut into slices and serve.

Dress it up by adding your favorite spaghetti toppings (olives, mushrooms) or something you'd normally put on pizza. I wonder how pineapple would taste?


Wednesday, April 25, 2012

Food Goals

I recently watched the documentary Fresh on Netflix - and it presented the state of our country as far as where our food comes from in a not so gut wrenching way as "Food Inc." did. Food Inc made me feel guilty for the meat I was eating, and honestly left a really unsettled feeling deep inside (I suppose that's the purpose!). Fresh follows several different farmers in different industries (chickens, hogs, urban gardening in Milwaukie) who have made the choice to grow organic products and use the knowledge from industrialization combined with old world practices of diverse communities.

My favorite quote:
As we've industrialized, we've made food cheaper, but also diminished it nutritionally... there is no such thing as cheap food. The real cost of the food is paid somewhere. And if it isn't paid at the cash register, it's charge to the environment..to your body. ~ Fresh

Over the last few years I've tried to become more intentional about what I put into my and my family's body. I made the effort to go organic where feasible, and although I've been cooking home meals for quite some time now, I took it one step further and am eliminating processed foods where we can too. Here's some of the changes I've implemented:

Bread- on temporary hold
At the start of the year I made it my goal to be baking our own bread and not buying any bread products from the store. This takes a bit more work and has a shorter shelf life, but the difference in taste is phenomenal. I've successfully made soft pretzels (they're gone before you know it!), honey oatmeal bread, bunny-buns for Easter, and English muffins.  Truth be told, since Penelope's arrival I have not had the time (or energy) to bake bread - but as she is getting older and a little less dependant, I'll be back to baking bread in no time.

Eggs - soon!
In the search for our next home, we're looking for a place with some acreage - between one and three.  Growing up, I remember my parents keeping 2 chickens and a rooster. Fresh eggs are amazing. I would love to keep my own chickens and have Penelope's chore be getting the eggs. I've been doing some research on the benefits of farm fresh eggs vs. what we buy at the store.
  • Pasture raised chickens are happy chickens. They peck, scratch and dig for their food - which varies by what is available in the earth and from kitchen scraps from their people. It's the same concept as grass fed beef - these animals are out doing their natural thing, not confined to cages or feed lots and fed manufactured food. They are healthier and don't need antibiotic treatments, which produces a better product.
  • According to MotherEarthNews.com, farm fresh eggs boast:
    • 1/3 less cholesterol
    • 1/4 less saturated fat
    • 2/3 more vitamin A
    • Two times more omega-3 fatty acids
    • Three times more vitamin E
    • Seven times more beta carotene
Keeping chickens is surprisingly not that hard. I've been told that the amount of time spent each day to manage 2-3 hens is less than 10 minutes. All they need is a hen house, a safe place to forage (which you just let them out a couple times a day, like any other pet), clean bedding and feed them scraps from the kitchen. The benefit? Fresh, healthy, superb eggs. I can't wait!

If keeping chickens is not your thing, it's not hard to find someone else who does and might be willing to either share or sell their eggs. Adam's old co-worker kept friends on a rotation and would give away any excess eggs that her hens laid.  And they came in all sorts of colors! Peach, green, blue, brown .. very rarely the white that we're accustomed to. Farmer markets or co-ops are a great place to find local eggs too.
 
Honey - maybe?
The honey bee shortage is making its way into the news more and more.  Some blame pesticides, others the weather. Guesswork aside, honey is rising in prices and demand. Over the last several years, my family has been getting our honey from a local beekeeper. Just like fresh bread or eggs, once you try local honey, you'll never go back to the Honey Bear. Unfortunately, rumor has it that even our supplier isn't going to continue after this year. His bees aren't producing enough to make it worth it.  So.. a thought popped into my head. Why not keep our own bees?  Probably the most hare-brained scheme I've come up with in a while, but hey - the internet says it's easy to do too. I'm still a little hesitant about this, but who knows, maybe it will work out.

Will you join the challenge of bringing more food from the kitchen? In what ways would you change if time and money were no object?

And, for your viewing pleasure - Penny on her play mat.

ShareThis

Related Posts Plugin for WordPress, Blogger...