Showing posts with label fall. Show all posts

Friday, May 8, 2015

Visiting the Aquarium of the Pacific - Our Family Trip to Long Beach (Part 2)


Read about our visit to San Pedro, Downtown Disney and how to babywear at the pool:
___________________________________


Visiting zoos and aquariums has kind of become my thing when I travel with the kids. This past year we've tagged along on three of my husband's work trips - Long Beach, Whistler & Vancouver BC and Dallas, Texas. The Aquarium of the Pacific was my favorite part of our trip to Long Beach.

We have an aquarium in Seattle, but to be honest it really hasn't been updated since I visited in high school. I didn't know what to expect at all when we visited the Aquarium of the Pacific and in hindsight, it was one of my favorite days ever.

The Aquarium of the Pacific is right in the harbor at Long Beach. One of the first exhibits that we walked into was the deep sea exhibit which featured a recreated "whale fall." When a whale dies in the ocean, it falls to the ocean floor and becomes a source of nutrition for many animals. The Aquarium recreated the habitat that it would have become. When I saw it in October, it had already been on display for several years and it really wasn't as gross as you would expect. The crustaceans that were working on it kept everything very clean, so there were several spots where ribs and other bones were exposed but picked clean. I've always had a fascination with the ocean, especially whales and the deep sea, so I geeked out a little bit and texted pictures to my real-life marine biologist friend, who had participated in several whale decropsies. She geeked out too!

The most impressive view at the Aquarium of the Pacific if their Blue Cavern exhibit. It's modeled after Blue Cavern Point near Long Beach, a popular diving spot.

Several times throughout the day they got a team of divers in the water. They cleaned the glass, fed the fish and were mic'ed so they talked to the crowd about what they were doing, who they were feeding and conversation information.

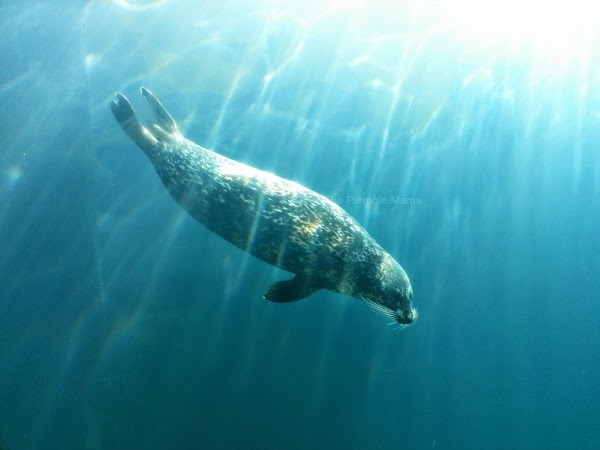
We also visited the penguins, seals and jellies. Then I got kissed by a ray.
Penny was in a pretty intense shark obsession phase, so it was only perfect timing that the Aquarium has an area where we could touch different types of docile sharks. We worked up our courage and Penny was able to pet one. I could tell that she was not expecting the skin to feel like sandpaper!
When big sister took her regularly scheduled nap in the stroller, I took little Ruby out and she got to get an up close view of the colorful tanks without Penny's toddler agenda pulling us around. This is one of my favorite pictures of Ruby as a little baby.
We easily spent 6 hours at the aquarium that day. I walked through all of the exhibits several times, each time finding a different tank that we missed because of too many people crowding it. The outside area had toddler story time, a splash park and more climbing structures to give the kids something to play with.

At dinner that evening, Penny asked me to draw a few of her favorite animals that she saw. All I had was a napkin, but she was happy to color them in for me too.


Have you been to The Aquarium of the Pacific? What was your favorite part?

See what zoos The Pierogie Mama has written about

Tuesday, November 4, 2014

Handmade merino infant hat from Öko Creations

This post was originally published as a part of 
Green Mom's Network Handmade & Eco-Friendly Holidays
________________

Bald babies. I got em! It wasn't until Penny was almost 2 years old before she grew a respectable amount of hair, and as a result hats are simply a part of our lives around here.

What catches my eye when it comes to shopping for a new hat for my littles?

-Anything that reminds me of an animal - it's got to be cute!
-Material; I look for high quality, alternative fibers, durable and organic where ever possible. Bamboo or wool are a favorite.
-Mode of manufacture: was it hand-made or at least ethically made?

I was so excited for Ruby to test-run an Öko Creations Merino wool baby hat! I have been a facebook fan for a while and am honored to get to share about their product and company with you.

Merino wool is highly desireable as a textile because the wool is so versatile in heat retention as well as breathability. Especially for those bald baby heads, you want something that keeps their skin warm but not causes them to overheat and sweat; because then you've got a wet hat and that's much worse than not wearing a hat at all. Best of all, organic merino wool is naturally antibacterial!

Oko Creations hand makes all of their products; has an intense focus on responsibility for the environment and to their customer (by providing the best quality materials as well as limiting environmental impact) and based on their awesome facebook and instagram feed it's fun to work there too! :)

It's important to me to support and share about businesses just like Öko Creations. Hand-made products are so special because you can just imagine the dreams and inspiration that went into the product that you hold in your hand; in this case, I know that someone lovingly made this hat with the idea of my little girl in mind. It was important to Marie-Noël and Melanie Beetz, the owners, and their seamstresses that Ruby and other babies are kept warm and healthy by making the commitment of higher quality materials and sustainable practices. And that, instead of the ease of picking up a $5 hat at a local chain, is why I will continue to support hand-made, small businesses like Öko Creations. And I hope you will too! 

And let's face it, this hat is adorbs. So adorbs, in fact, that Penny has dubbed it as Ruby's "snail hat," because the two peaks remind her of snail antennae. And snails are kind of her current obsession.
Isn't she a stinker?

In addition to the very cute snail antennae, I like that it covers her ears and back of her neck appropriately. She just looks so cozy and squishy. And that little tongue - well, that's kind of her signature expression right now.
These hats come in two sizes (NB-3 months, 4-12 months) and Ruby is in the larger size. The material is stretchy and forgiving, I can see her using this hat well past her first birthday. It doesn't feel like wool either, it feels like an interesting mix between bamboo and wool to me. It's well sewn and even when Ruby is done, I can see using this for another baby down the road. ;)

Öko Creations is offering a Pierogie Mama reader one too! Öko Creations is based in Canada, however if you are in the US and want to place an order, send an email to info@okocreations.ca and they will take your order and arrange for US shipping.  They are working to make US ordering easier. 

This giveaway is over - thanks to all for entering! 
Keep an eye out for more Pierogie Mama Giveaways.

Disclosure: I received product in exchange for my honest review, but as always, all opinions are my own and I only share what I love! 

Sunday, July 20, 2014

Seattle area: Got a princess? Take her to the Enchanting Fall Ball!

I've mentioned a few times around the blog that we are in full princess mode with Penny. It hasn't been that much of a surprise; my husband's family are die-hard Disney lovers and there has been plenty of princess swag passed down and around. We love it, it's cute, and I'm working really hard to teach my daughters what the true meaning of a princess is. She's anything but a dainty waif who waits around for her prince to do the job - Disney has been doing much better as portraying stronger female characters than they have in the past.

Not too long ago we met a few of the characters of Enchanting Princess Events.  Not only was that experience what led to the full on princess-obsession that currently rules my house; meeting these ladies has started my thinking-wheels on how to successfully introduce women as capable and strong role models.
After our quick meet-and-greet with Beauty and Cinderella, I contacted Lianna (who plays Beauty) and we got to talking about how she started her company and how we can work together. I quickly learned that Lianna has the same goals in mind when it comes to using her power as a princess in molding young minds and making a difference.

You see- dressing up and taking photos with children isn't all what it's about for Enchanting Princess Events. These ladies take it a step further and give back to the community. In addition to being available for private events, the characters of ePe host various non-profit events and you'll find them throughout the greater Seattle area for various appearances; namely visits to the Children's Hospital! Lianna says "when we visit the hospital, our characters get to visit the Playroom as well as the various floors with patients and we autograph photos to leave with everyone. The kid’s expressions are so priceless when visiting! Our last visit, The Ice Queen and Ice Princess attended and most of the patients had Frozen playing in their rooms! We aren’t Russell Wilson, but we are able to make some of the patient’s day!" 

Their largest fundraising event is their annual Enchanting Fall Ball, which is held in October. With the growing popularity over the last 3 years, ePe has been able to expand the beneficiaries of this event to The Children’s Museum of Skagit County and the Boys and Girls Clubs of Snohomish County!

This year the Enchanting Fall Ball is being held at the Marysville Opera House. At the Fall Ball there will be mingling, photos, activities, desserts and of course, DANCING! A couple surprises include an Arendelle area including Wandering Oaken’s Trading Post! The entire family will love it! In addition to the 2 ball sessions, there are limited slots available for the VIP (Very Important Princess) ticket. There are only 9 tickets available for each VIP Tea event and you get to have your own private tea party with the 9 characters for an hour before attending the Fall Ball!

The heart for charity and bringing children to higher levels is really what sets Enchanting Princess Events apart from any other "book a character" business. You can also easily see from the photos that the characters and their costumes look like the real thing. Lianna takes great pride in her business that everything about these princesses are real. They do not wear wigs (well, Rapunzel had to break that rule, but she really does have long blonde hair!) and their dresses are custom made for the actress. I daresay that their dresses are truer to the movies than what the actresses at Disneyland & Disneyworld's actresses wear!

It's the deliberate act of acting real and being real that is important to the characters of ePe, as well as showing little girls that a princess is not just pretty. This is why Lianna also launched Enchanting Apparel, to display some of the characteristics of each princess that is beyond simply beauty. These adorable shirts carry words that identify strengths that young women should all strive to achieve. The goal with this line is to encourage young girls that being a princess is not all about being pretty, but more importantly embracing the inner beauty and amazing characteristics they possess. There will be an exclusive Enchanting Apparel shirt available for pre-purchase for the Fall Ball!

So have I convinced you that this is THE event of the season to take your littles to? Yes, even your sons will enjoy the magic coming alive from their favorite Disney classics! Lianna has made an unprecidented, exclusive offer to Pierogie Mama readers for tickets at a discounted rate to the Enchanting Fall Ball on October 18, 2014.

This special discounted rate will be valid only from July 20, 2014 - August 1, 2014. On August 2 their tickets will be at full price. So get this date on the calendar, get your family dressed up in their best and
be our guest!

You'll see my little Pierogie family at the first session of the fall ball.  If you happen to notice us, please stop me and say hi! I love meeting my readers :)

Keep in touch with Enchanting Princess Events

Comment below and tell me which princess is your & your child's favorite!

Disclosure: Thank you, Enchanting Princess Events, for sharing about this great cause and event with my local readers, and for sponsoring my family to attend the ball. No other compensation was provided, all opinions are my own. 


Wednesday, April 9, 2014

Sour Cream Zucchini Bread with Coconut Oil

This is a revamp on my previous recipes of sour cream banana bread and sour cream pumpkin bread. Seriously, what else can I mix into this fantastic recipe that won't be a win?

Yields 2 loaves

You will need:
non-stick cooking spray
1/4 c of sugar with 1/2 tsp ground cinnamon
1/2 c softened butter (or 1/2 c Tropical Traditions Extra Virgin Organic Coconut Oil)
1 1/2 c sugar
2 eggs
2 c shredded zucchini (drain for 30 minutes)
2 c  sour cream
1 tsp vanilla extract
1/2 tsp ground cinnamon
1/4 tsp salt
1 1/2 tsp baking soda
2 1/4 c flour
*Optional: Toppings such as more cinnamon-sugar, candied pecans or chocolate chips.

You will do:
1. Preheat your oven to 300 degrees.
2. Spray 2 bread pans with your non stick spray.
3. In a small bowl mix the 1/4 cup of sugar with the 1/2 tsp of ground cinnamon. Dust onto the greased pans.
4. In a stand mixer cream butter and remaining sugar together. Add eggs, zucchini, sour cream, vanilla, and cinnamon. Mix until well blended.
5. In a separate bowl, combine flour, baking soda and salt. Slowly incorporate into the zucchini mixture.
6. Divide batter between your pans.
7. Top with cinnamon-sugar, candied pecans or chocolate chips.
8. Bake for about an hour (but check at 45 minutes), or until an inserted toothpick comes out clean.

To freeze extra loaves for later:
  • Allow the bread to cool off completely
  • Wrap tightly in plastic wrap
  • Bag in a large freezer bag
  • Freeze
  • Use within 3 months

Sunday, October 13, 2013

Gender Reveal Party

Today was our gender reveal party. We had our ultrasound on Wednesday last week and it was tough keeping it a secret from the family until today. I pretty much had to be on a 'text only' basis, otherwise something was going to slip.

Our menu:
Balsamic spinach pasta salad (my mother in law's delicious recipe)
Deviled eggs
Crackers with a topping of cream cheese, smoked salmon and my mom's homemade pear sauce
ruske / potato and cheese pierogies (but of course!)
prosciutto and melon appetizers
fruit, veggie, meat/cheese/cracker platters
Baked brie with walnuts and cranberry sauce


And the grand finale:
the gender was revealed by way of cakepops. I used's The Kitchn's cakepop recipe using devil's food cake, sweet cream cheese and chocolate almond bark to coat.

The family members were told that the flavor of the cakepops is chocolate and only one of the 20 pops will have the gender of the baby revealed by the color of the batter. Kind of a Charlie Bucket and the golden ticket kind of thing.

We are so excited for Penny to have a younger sister. I don't have a sister and I think their closeness in age will be wonderful.

Wednesday, October 2, 2013

Sweet Roasted Pumpkin Seeds

I've been attempting to hone my roasted pumpkin seed recipe for the last 4 years. That sounds worse than it is, after all most of the time I only get to work with a few cups of seeds at a time ;)  They'd either end up burned or just too oily. I tried all types of oils - olive, vegetable, butter...and this year I was determined to get it down!

I did a little bit of preliminary research and found a technique that I hadn't tried before.. Boiling the seeds before baking. Weird, right? But apparently it helps plump them up and they get crispier. I also tried using coconut oil and this was perfect for this sweet version of pumpkin seeds.

You will need:
1 T Tropical Traditions Extra Virgin Organic Coconut Oil
2 T brown sugar
1/2 t cinnamon
1/8 t salt
1/3 c clean, raw pumpkin seeds
small pot of salted, boiling water.

You will do:
1. Remove all pumpkin pulp from the pumpkin seeds.
2. Boil in salted water for about 10 minutes. Preheat the oven to 325 deg F.
3. Drain the pumpkin seeds from the salted water, pat dry on a towel. They don't have to be super dry, just not soaking.
4. Mix pumpkin seeds with melted coconut oil, brown sugar, cinnamon and salt. 
5. Spread out onto a metal cookie sheet, taking care that the seeds don't touch each other too much.
6. Bake for 10 minutes, toss, bake for another 10, toss, bake for another 5-10 minutes. The last part will vary quite a bit. Just check on the seeds by sampling one after the first 20 minutes and adjust from there.
7. Remove from the oven and allow to cool.
Enjoy these alone or ... sprinkle them on top of some sour cream pumpkin bread!


Disclosure: This post contains affiliate links.

Friday, September 13, 2013

The Recipe Crucible: Pillsbury Biscuit Turkey & Muenster Grilled Sammies


A little Bianca factoid...yes, I keep a very healthy Pinterest account. But when a recipe has been tried and true, it makes its way into my legit recipe box. It's written on paper and hopefully immortalized for the next 50 years (or more, if one of my children end up loving cooking too!).

September has always been a time of transition for myself and many other families. It's the start of school, obviously a change in season and it always seems like I am moving in September / October. I'm going to say this one last time - this better be the last time we move for like 15 years!! ;)

During this time of transition families are busier than usual and honestly the time and energy spent in cooking sometimes takes a nosedive. Our family doesn't have anyone starting school (not for a couple more years), but the transition of moving into our new home and the renovation taking place in the kitchen has definitely made things a little tighter, less comfortable and not as easy to prepare full on dishes like I normally like to.

So this little quick and easy recipe that I'm going to share with you below is in the beginning stages of this crucible - initially saved via the internet/this blog, and maybe one day will graduate into recipe cardhood.

Originally adapted from Grands! Grilled Cheese Sandwiches.


You will need:1 can (16.3 oz) Pillsbury® Grands!® refrigerated buttermilk biscuits (8 biscuits)
8 thick slices of Muenster cheese (I went straight to the Deli counter and asked for nice thick slices)
1/2 lb of pepper crusted sliced turkey breast meat (also found at your Deli counter)
honey mustard
extras: avocado, tomato, bacon
Makes 4 sandwiches


You will do:
1. Heat a non-stick skillet on high heat. 

2. Meanwhile, flatten the biscuits into discs, similar to mini personal pizzas. The key here is to get them nice and thin, otherwise you'll end up with regular biscuits! You can stretch them like pizza dough or use a rolling pin.

3. Once the pan is hot and the biscuits are flat, add one or two biscuits at a time to the hot pan. Cook for 1-2 minutes per side. Once it is brown (like a pancake) flip it over and cook the other side. Set aside when cooked.
4. After the biscuits are cooked, layer on a spread on a little bit of honey mustard, add two slices of cheese, some meat and any of your additional toppings. Sandwich together.
5. Return the sammies to the hot pan, adjusting the temperature to medium/low so that the cheese can melt without burning the biscuit. 
6. Bon appetit! These are so simple that you can really adjust them to fit whatever you have in your fridge for a hot sandwich.


What would you fill your sammy with?
Download the Pillsbury recipe booklet for more easy recipes and comment with a Pillsbury Grands! Biscuits recipe you'd love to try!


I was selected for this opportunity as a member of Clever Girls Collective. The content and opinions expressed here are all my own and are not indicative of the opinions or positions of General Mills. Compensation was provided by General Mills via Clever Girls Collective.

Saturday, November 10, 2012

Sour Cream Pumpkin Bread

Sour cream. One of my favorite condiments. And now, one of my favorite ingredients to bake with.

You've seen my post on sour cream banana bread. This is a rendition of that recipe, only with pumpkin instead of banana. So festive, right?

A few weeks ago we took a visit to the local pumpkin patch, where we picked our our family pumpkin and I also snagged a yummy sugar pie pumpkin.

Did you know that the canned pumpkin that you buy is actually winter squash? That's why when you taste something cooked or baked with actual pumpkin, it tastes so different (and better!).  But, be warned, the carving type of pumpkin does not taste the same as the type of pumpkin you'd use for baking or cooking. You'd want a sugar pie pumpkin for that. The reason for that is because carving pumpkins have been cultivated to grow large quickly, and they really don't have very good flavor to them. But sugar pie pumpkins are soooooo delicious!

Now that I've really piqued your interest, you might be wondering how to prepare said pumpkin. Super easy.
  • Preheat oven to 350 degrees F
  • Cut pumpkin in half (horizontally)
  • Scoop out the guts and seeds (save the seeds to roast them!)
  • Place halves face down on a tin foil lined pan
  • Bake for 30 minutes to an hour. The reason for the variation is that the thickness of the walls can vary. My first pumpkin this year only took about 30 minutes, but my second was much thicker and was almost the full hour. You will know when it is done by after 30 minutes, take it out quickly and flip one half over - stick a fork into the flesh and see if it is soft (like mashed potatoes). If it is hard at all, turn it back over and return to the oven for at least another 15 minutes.
  • When it's done, remove the pumpkin from the oven and turn the halves over and cover with a dish towel and allow to cool off. Putting the dish towel over the pumpkins will allow them to cook off but not overly dry out because of the steam escaping.
  • After the halves have cooled, take a spoon or ice cream scoop and start scooping out the flesh. It should be very easy. You can either store it in a tupperware as is (with a little bit of chunk to it), or you can puree it immediately and then store in a tupperware. It should last in the fridge for about 2 weeks.
  • One sugar pie pumpkin will produce around 4 cups of pumpkin puree.
 Ok, so on to that awesome pumpkin bread recipe.

You will need:
non-stick cooking spray
1/4 c of sugar with 1/2 tsp ground cinnamon
1/2 c softened butter (or 1/2 c Tropical Traditions Extra Virgin Organic Coconut Oil)
1 1/2 c sugar
2 eggs
1 1/2 c of home made pumpkin puree (see above)
2 c sour cream
1 tsp vanilla extract
1/2 tsp ground cinnamon
1/4 tsp ground nutmeg
1/4 tsp ground cloves
1/4 tsp salt
1 1/2 tsp baking soda
2 1/4 c flour
*Optional: 1/4 c candied pecans

You will do:
1. Preheat your oven to 300 degrees.
2. Spray 2 bread pans with your non stick spray.
3. In a small bowl mix the 1/4 cup of sugar with the 1/2 tsp of ground cinnamon. Dust onto the greased pans.

4. In a larger bowl, cream butter and remaining sugar together. Add eggs, pumpkin, sour cream, vanilla, cinnamon, nutmeg and cloves. Blend until well mixed.
5. In a separate bowl, combine flour, baking soda and salt. Slowly incorporate into the pumpkin mixture.
6. Divide batter between your pans.
7. Top with candied pecans.
8. Bake for about an hour (but check at 45 minutes), or until an inserted toothpick comes out clean.

I promise, just like the original sour cream banana bread recipe, this sweet bread won't last long in your house.

Disclosure: This post contains affiliate links. 


ShareThis

Related Posts Plugin for WordPress, Blogger...